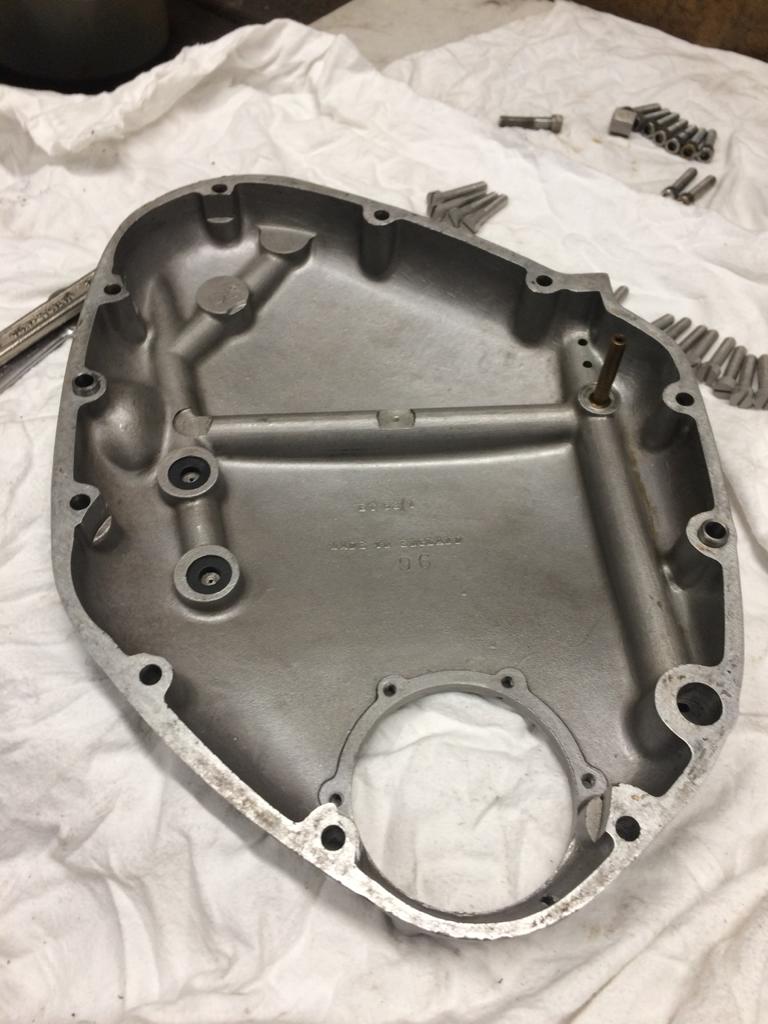
The timing cover was carefully inspected and cleaned before mating up to the crank cases.
Missing dowels were replaced along with new seals.
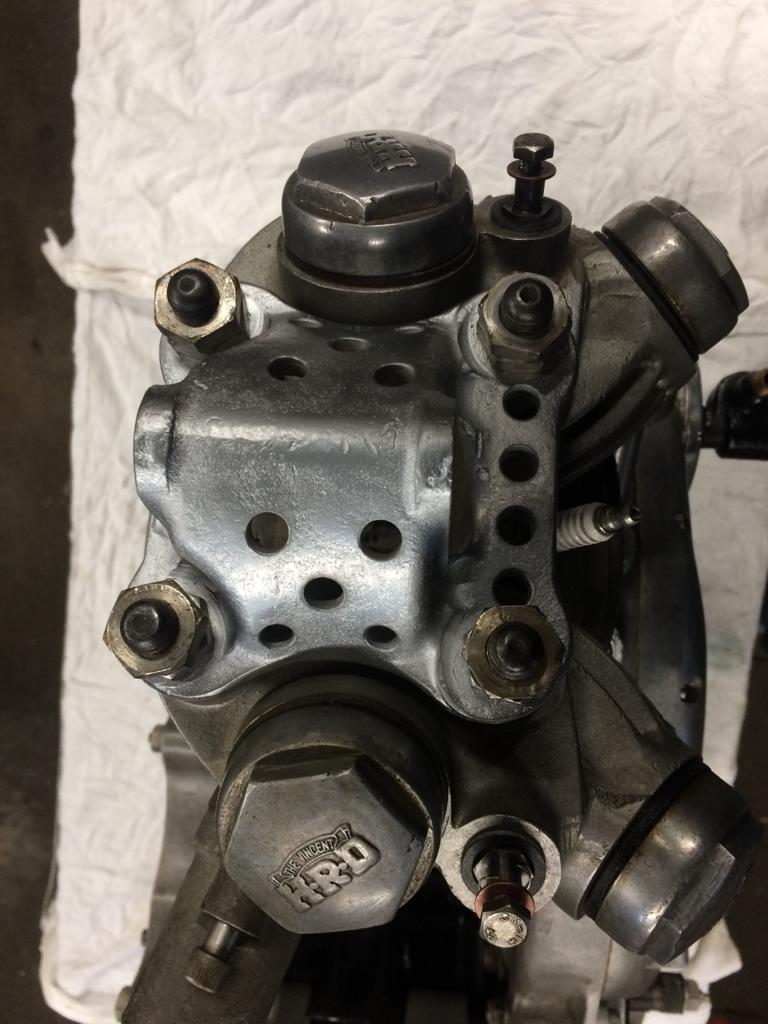
The big end oil feed quill and relief valve.
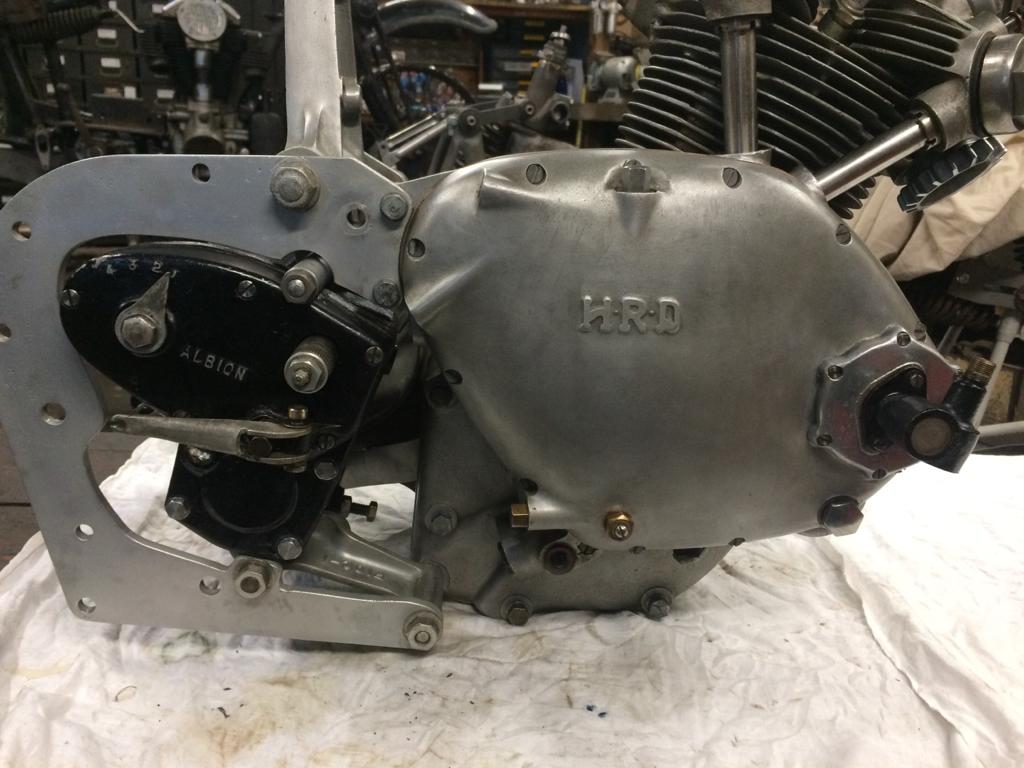
The rare works racing tachometer drive and an NOS gearbox were installed.
The cover screws look a little out of place and will be attended to later.
The drilled and dull chromium plated FT3/2 is now in place and looking superb:
So satisfying to see this in place…
The keener amongst you will have observed the plethora of original fasteners employed. Herewith are some pics of the period fasteners used on the project thus far.
It turns out that the above two nuts are not what’s required here – more in another post about this.
Looking at these positively gives me an erection…💧
The UFM fitted.
So much effort and head-scratching to get to this stage.
A symphony in metals and hues…
We’re far from finishing but a pivotal moment has passed. There are major hurdles left to clear but things are starting to come together. Purists amongst you may find reason to comment negatively but please remember, we are not trying to achieve a generic level of finish – this important motorcycle is being restored with many of the parts employed during its racing career, as a tribute to the men who raced it. 😊
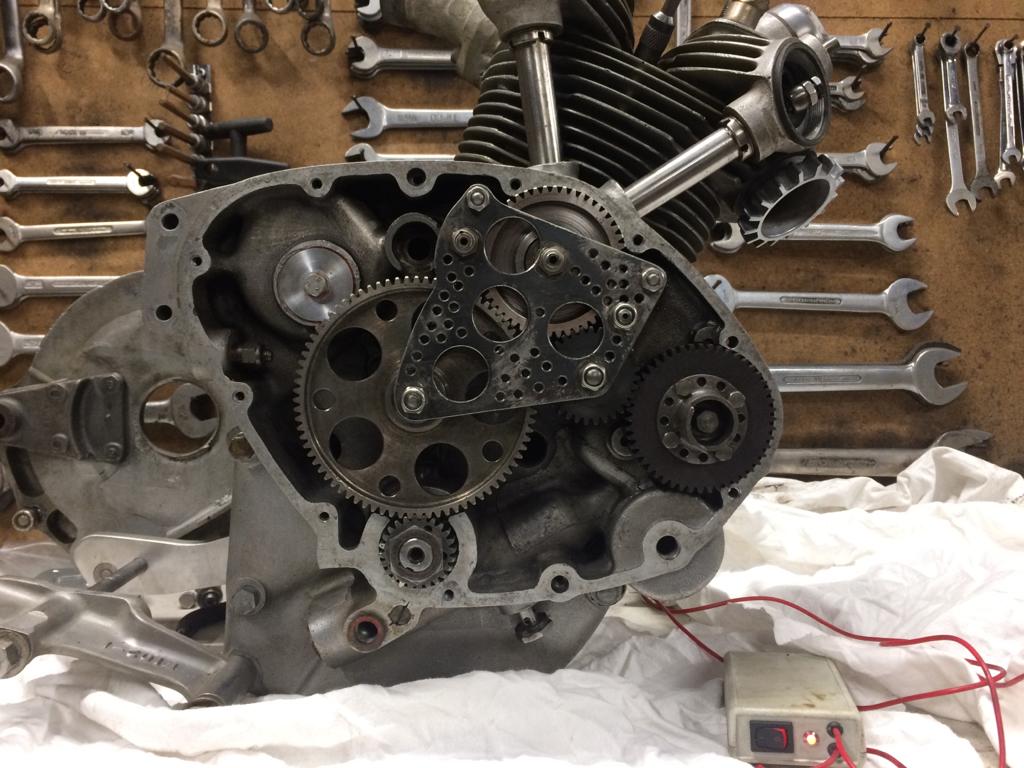
Bert has gone through the motor carefully, thinking through every aspect of its running. Any anomalies uncovered would have necessitated it being stripped down for inspection and attention to the affected area. Oil is flowing through the crank, as it should and the motor turns smoothly with no untoward play or issues. The bore has been inspected and passed.
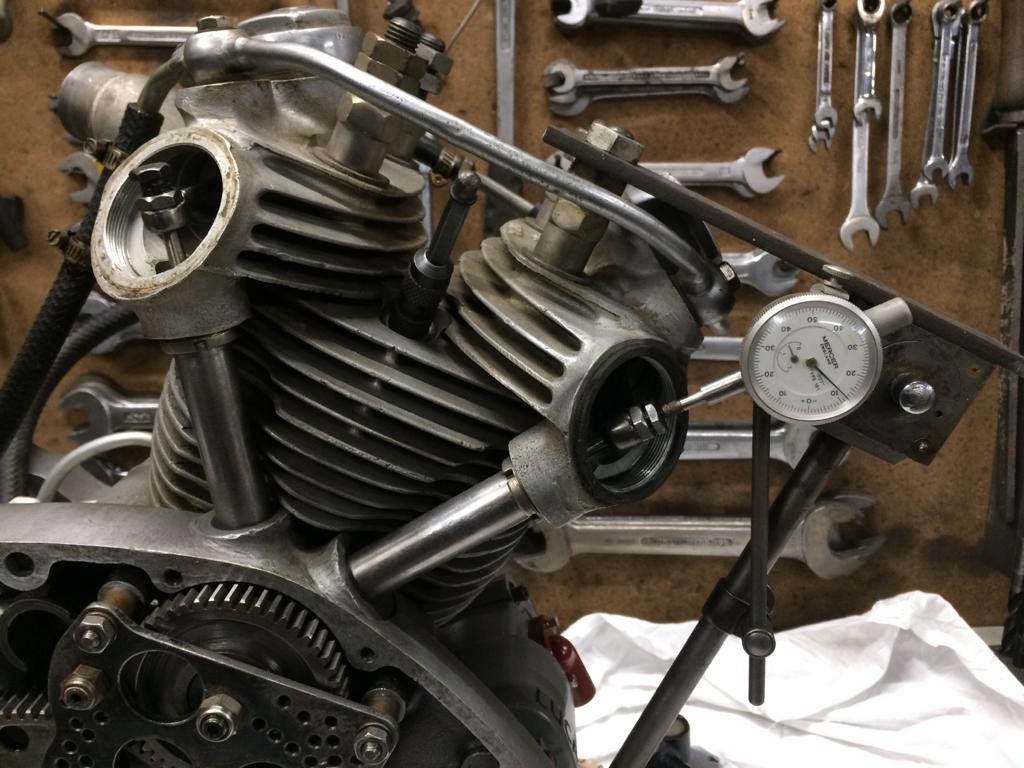
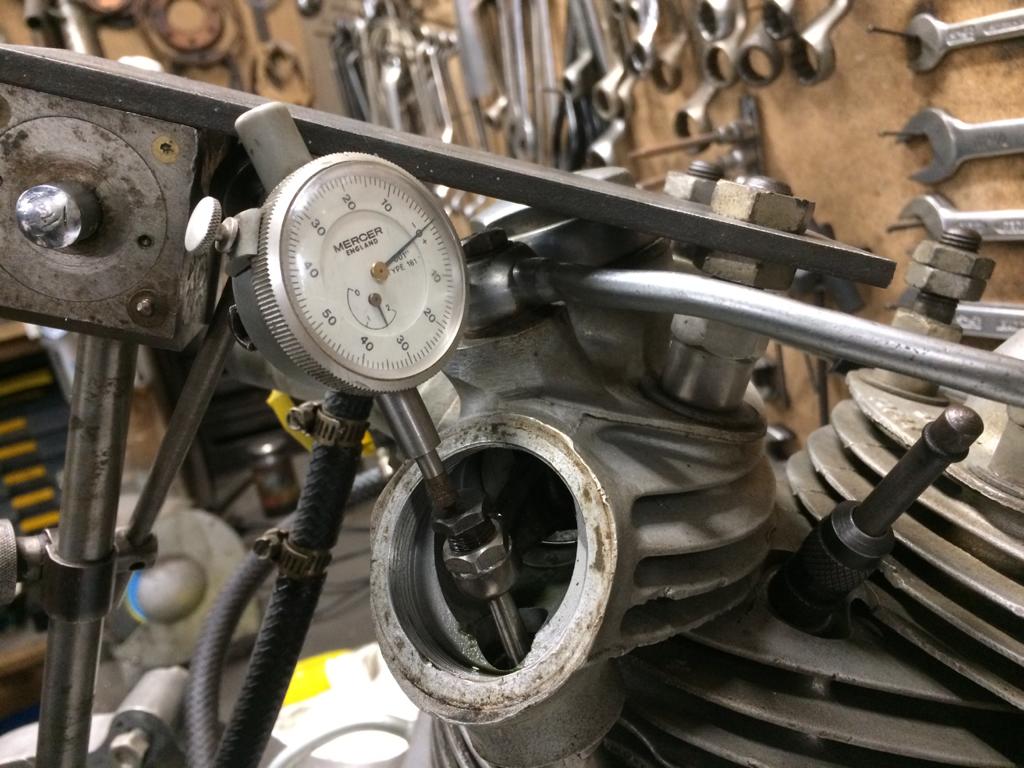
The valve timing has been re-checked.
This time it was checked, as above, as recommended by a learned reader!
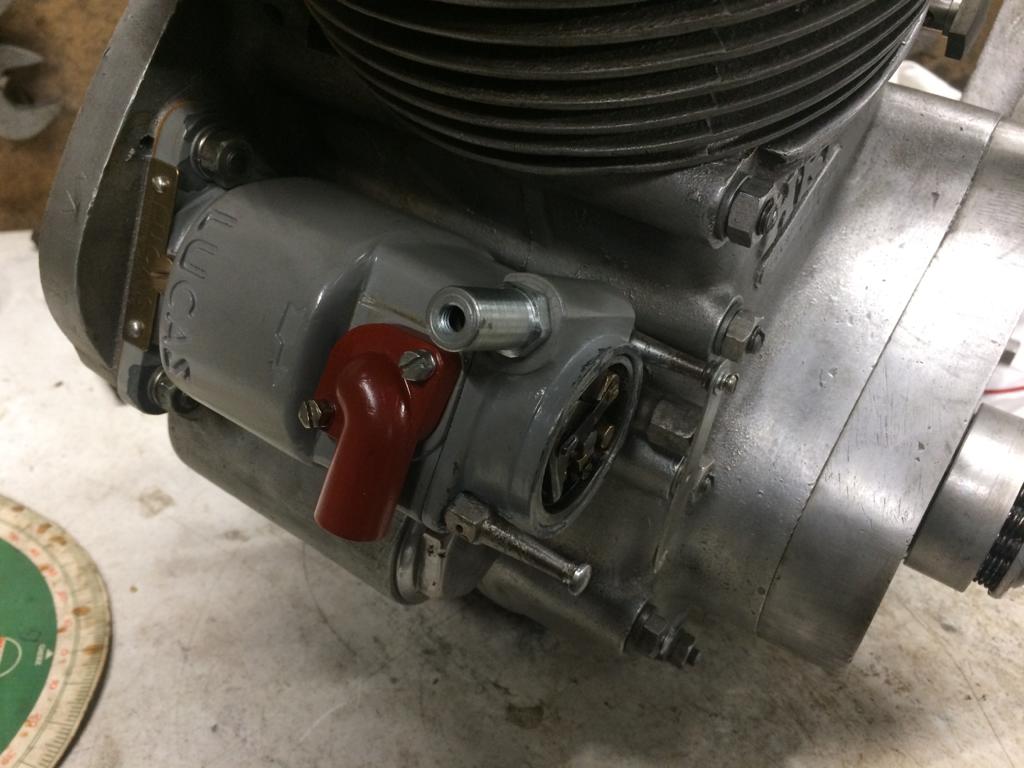
The K1FTT magneto has been mounted and timed – the paint needs a touch-up….
Reuniting this rare magneto with the bike it would have been originally fitted to is a truly satisfying moment, ahhh…!
There has been a bit of a delay in progress as I have been busy with a time-consuming project and Bert has been engaged with other pursuits. The engine is in “last raced” condition and we want to leave it as-is so long as we can be sure that there are no issues that will (i) prevent its smooth operation and (ii) might lead to a catastrophic failure in the near future. Last rebuilt by Terry Prince, some three decades previously, it was only used sparingly by the Japanese owner prior to my acquiring it. Nevertheless, everything needs to be gone through methodically to ensure no disasters occur. The racing days of this machine must surely be over and it’s unlikely that from now on it’s going to be run for anything more than the odd parade/demonstration lap.
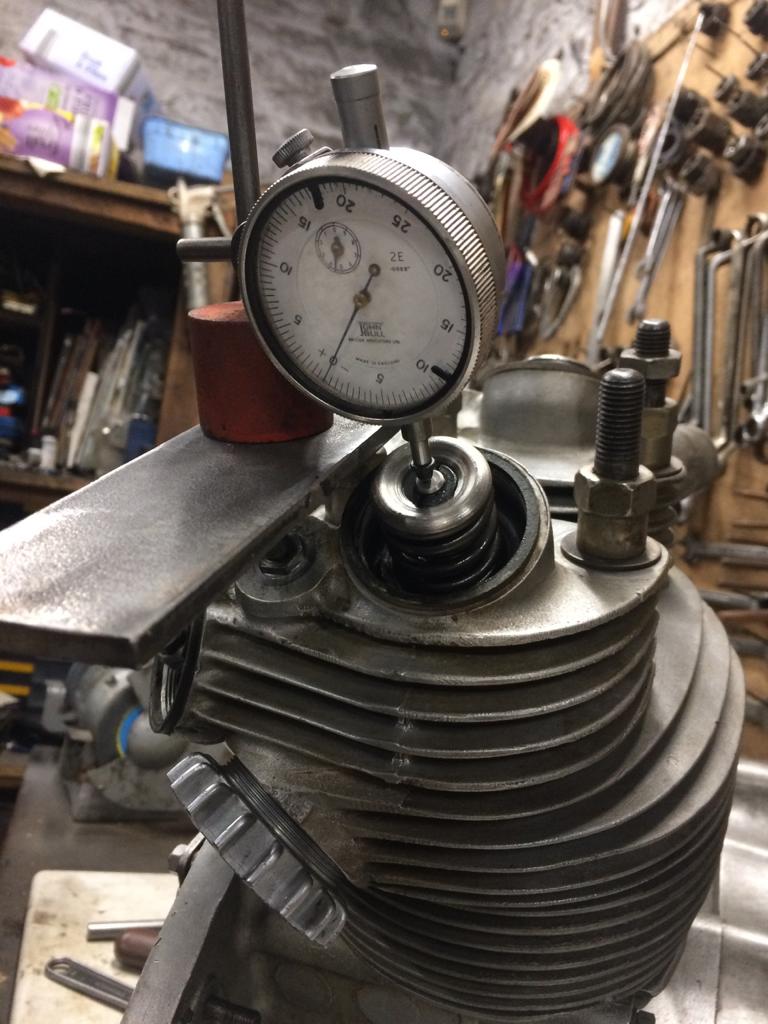
Timing the valves.
The valve timing was carefully checked using a degree disc. The values were as follows:
These figures are close enough taking into account the specially re-profiled cams fitted.
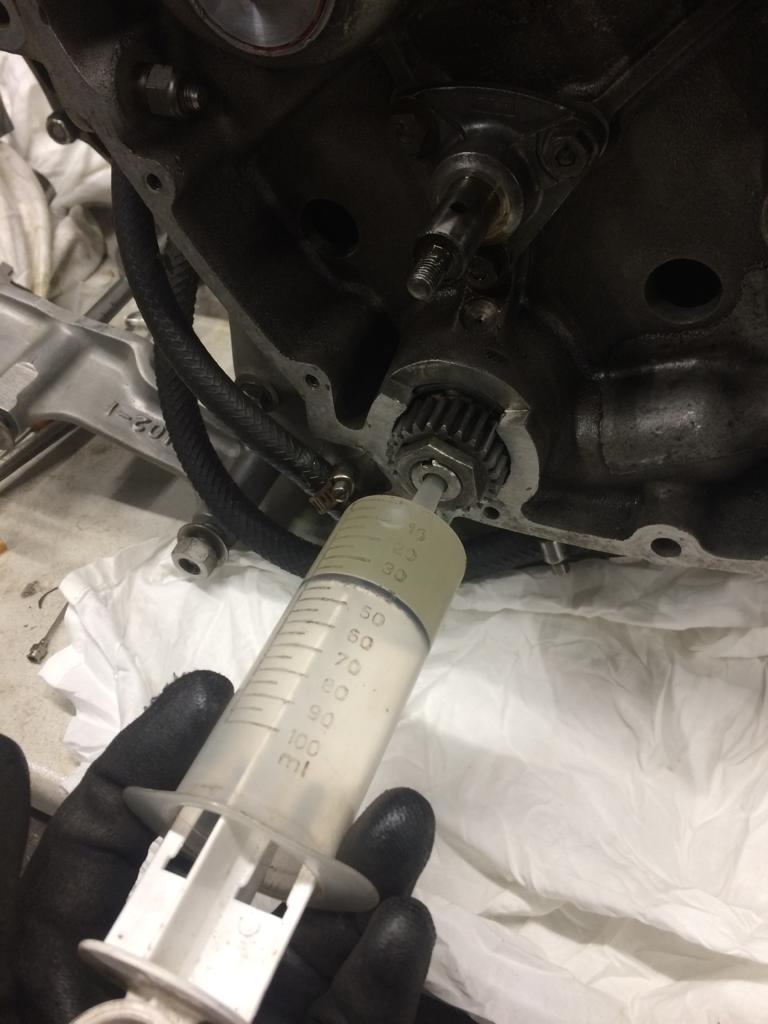
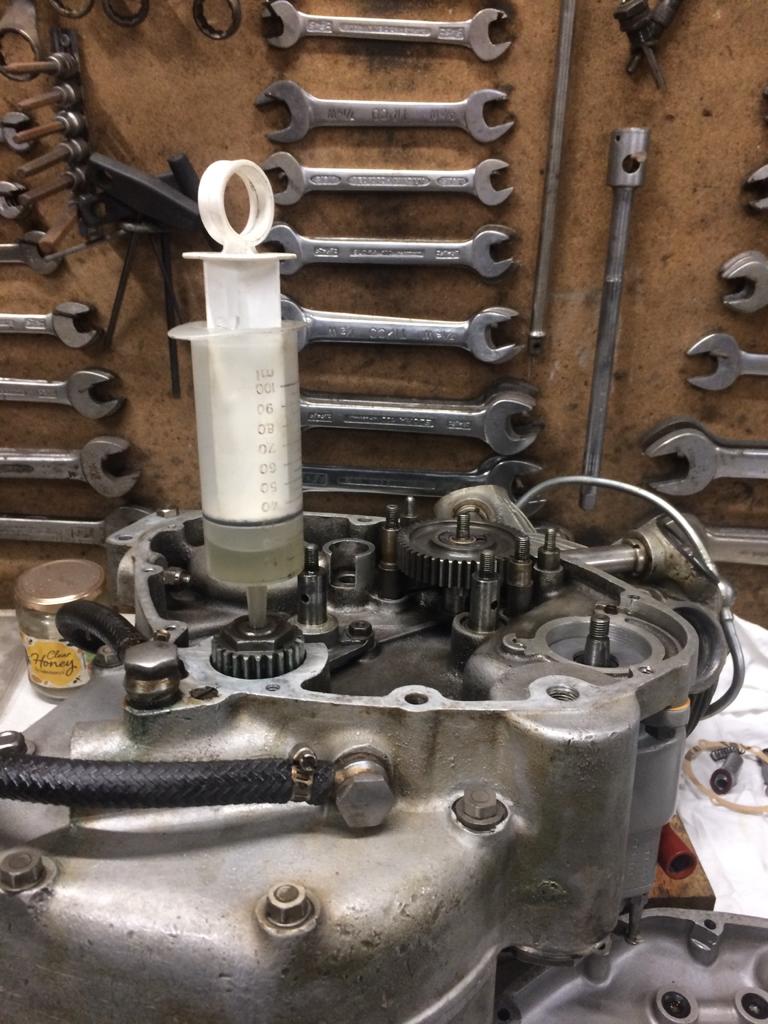
Flushing the oilways via the oil pump quill.
Injecting clear honey into the big end…
No! Thinners was actually the solvent used to ascertain whether oil was able to circulate freely and lubricate the bottom end as intended. Once this was noted to be flowing unhindered then clean oil was introduced in a similar fashion.
The motor spins freely with no perceived issues. The oilways have been cleared and the valve timing checked. All is deemed satisfactory for the unit to be run in this “last raced” state.
This post is fairly self explanatory so I won’t blab on. The dull chromium plate looks good and the spring box inners have been left as-is. The dampers are reconditioned units from Maughan & sons Ltd – the bodies look a little “fresh” for my liking but they will work as intended should the bike be used for demonstration laps.
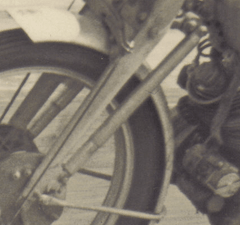
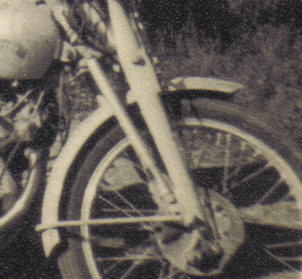
I had wondered whether the spring box inners might also have been dull chromium plated. Looking at these period shots of 2751 I would say not. The grainy nature of the old black and white photograph makes everything look dull! But if you compare the spring box inners to the shiny exhaust pipe they appear similar in lustre.
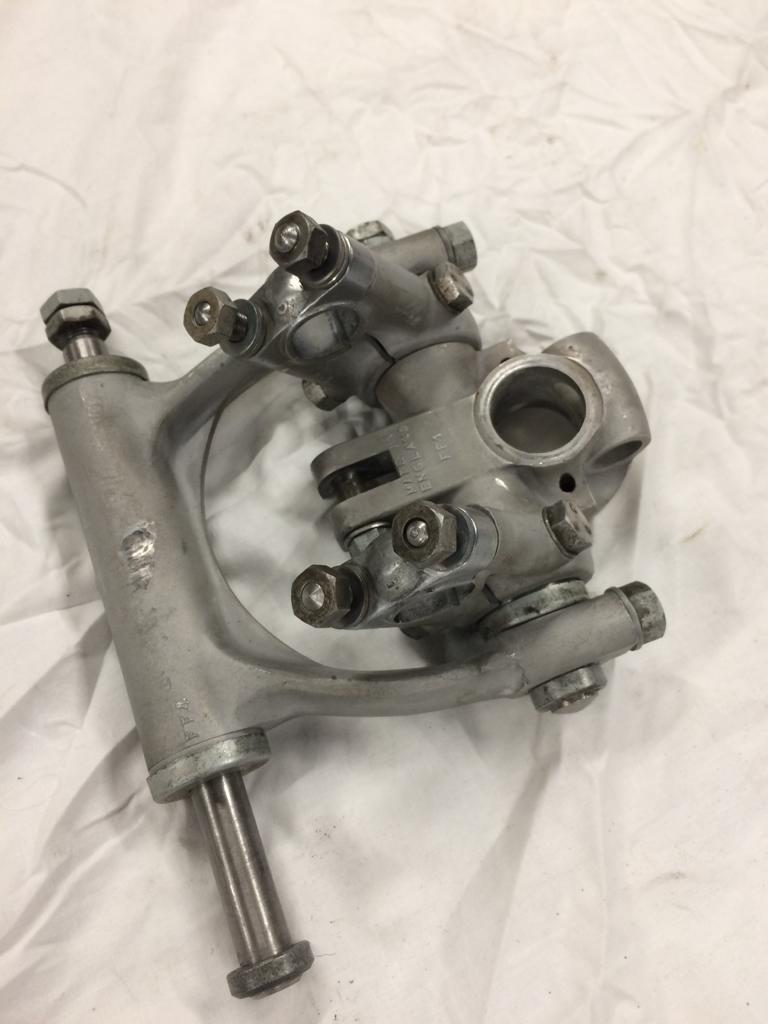
Now that we have some parts back from the platers it’s possible to finally make a start on the assembly process. The top and bottom forks links were a good place to begin and so Bert took his time building them up.
A shot of the assembled bottom link and steering stem.
Since I acquired the bike in 2008 I’ve been on the lookout for original cadmium plated fasteners for this restoration. I managed to acquire several kilos from famed Vincenteer Vaughn Greene in California, a real mother lode.
This little lot only arrived last week! Many thanks to Jim Burgess for these.
Whenever I had the chance to acquire some original fasteners I did – and now that foresight is paying us dividends… During the build process, Bert is able to replace many stainless steel items fitted to the bike with proper cadmium plated ones.
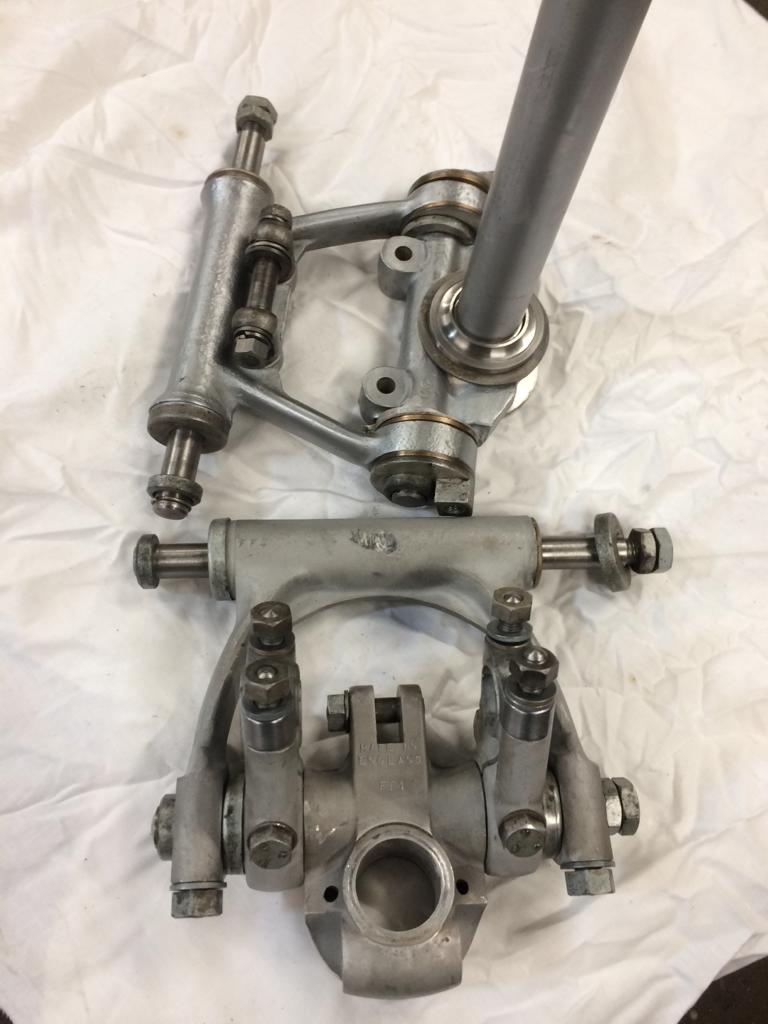
The top link and head clip anodised assembly. The handlebar clamp caps are dull chromium plated.
Both links together.
These assemblies look spectacular enough even without their exotic finishes… The culmination of some 14 years of planning and scouring for rare parts, it’s very very satisfying watching everything come together to the point where they’re being assembled. Meticulous work to preserve an important and unique machine.
Bert got a call from platers-par-excellence Vernon Moss last week and picked up a box.
Looking a bit too shiny but promising. The bill for this work was considerable (and is just visible)!
These were a variety of parts: some original but with little plating remaining (for re-plating), some original (but not to 2751), some new (the stays) and some manufactured to works drawings (the tacho bracket).
Laid out on Bert’s freshly cut lawn…
Great pains were taken explaining to Vernon Moss about the kind of finish we required. Several months ago some test plating was undertaken and the process formulated, agreed upon and duly recorded. The result looked close to what we hoped but a little too shiny which is only to be expected from parts just out of the tank. Bert set about experimenting how he could carefully tarnish them to match original dull chromium plating on the bike.
A comparison of plated spring shrouds and the original dull chromed rear frame member.
The above shot shows how close we have got to matching the original finish – I feel, a very satisfactory result. 👏🏻
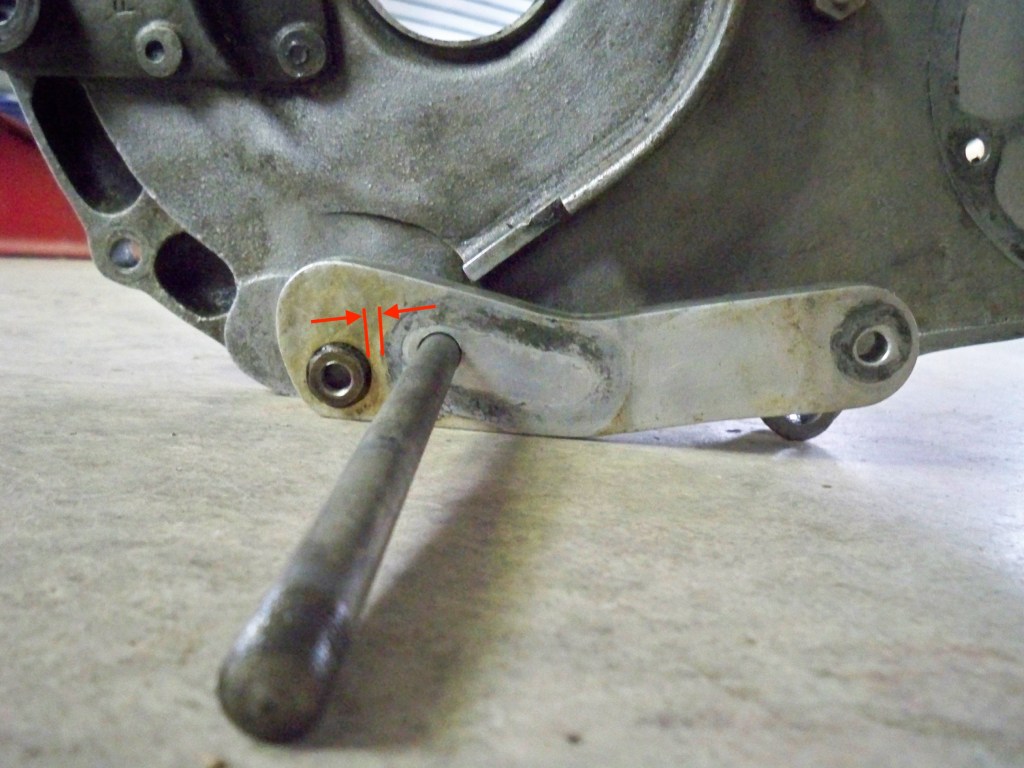
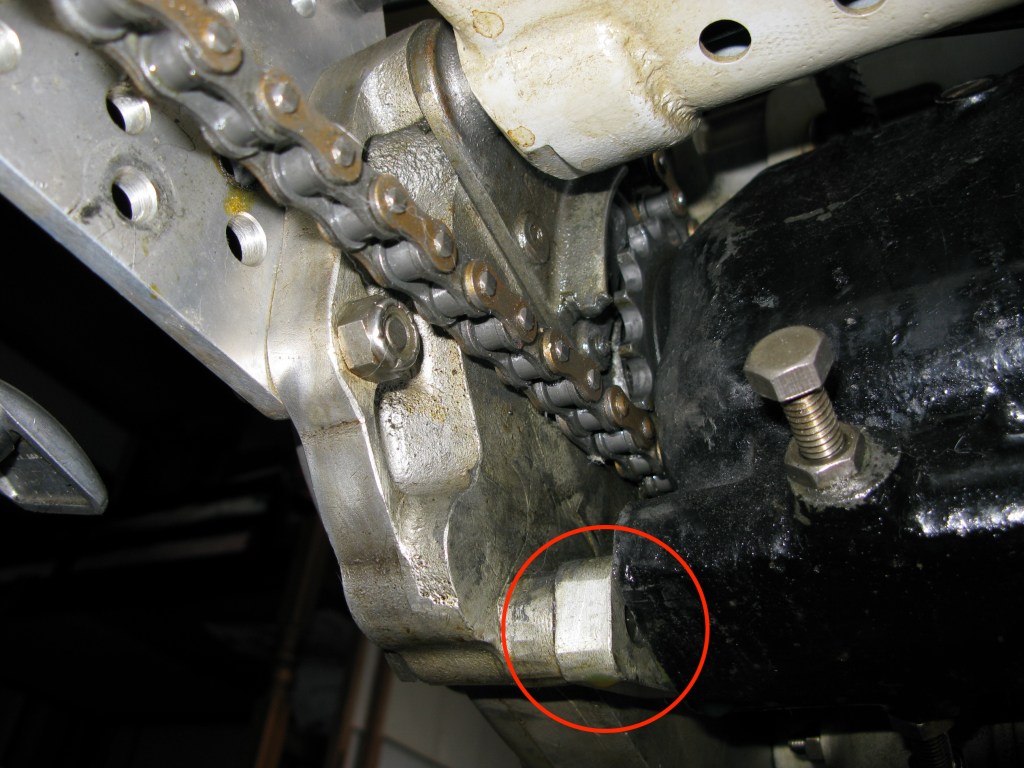
As mentioned in the post before last, there was something that we felt we needed to get to the bottom of. The image of this component, kindly sent to us by David Dunfey, featured a nut seated in a counter bore. This nut had been torqued into place and was held by the edges of the bore to stop it turning, enabling a bolt to secure the cranked plate from the inside of the inner primary chain case. We felt that this wasn’t perhaps what had initially been conceived… With the nut protruding, gearbox adjustment would have been practically nil.
Here we can see the countersunk nut. Image courtesy of David Dunfey.
The “witness mark” of the gearbox adjusting slot is visible in the shot. If the gearbox were adjusted to move backwards, the slot casting would have come into contact with the protruding nut. Image courtesy of David Dunfey.
We felt that The Works would have employed another solution, enabling full adjustment of the gearbox…
Solution #1.
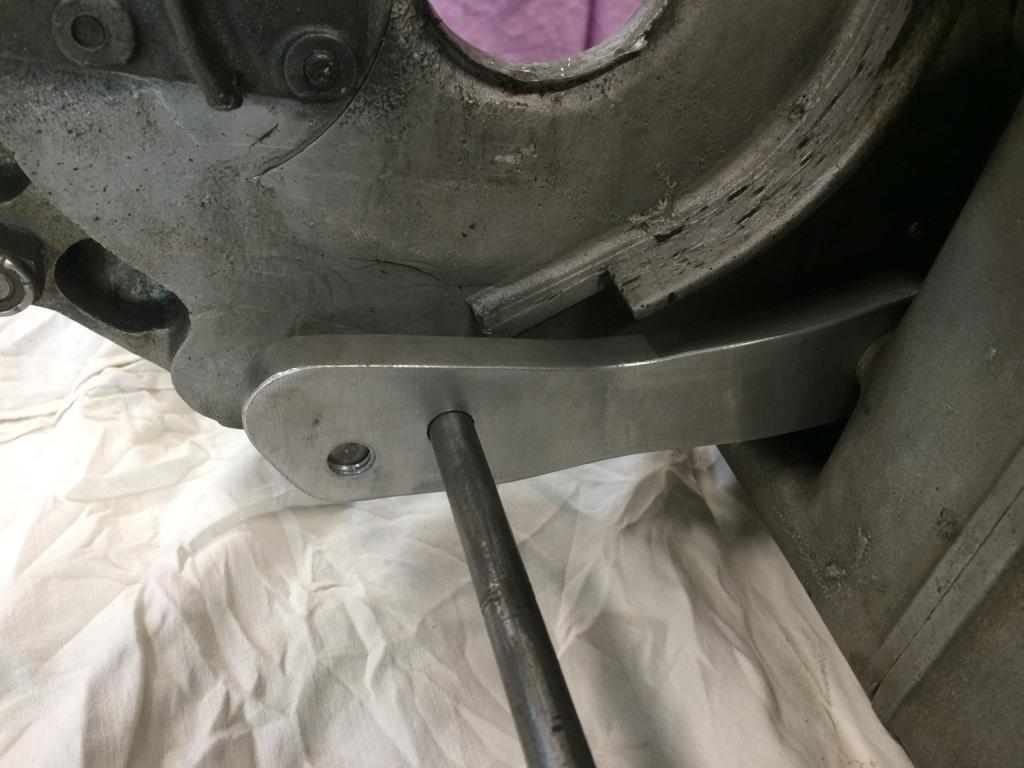
First, Bert drilled and tapped a hole for the bolt. This looked better than the captive nut arrangement and would have allowed for full gearbox adjustment. I persisted with another line of thought though, despite Bert telling me it’d be good enough as-is… David’s plate was counterbored and this surely would not have been done so neatly when the bike was being used in anger on the track. I surmised that the unthreaded, counterbored hole had been for the fitment of a threaded “top hat” arrangement. I insisted and Bert set to work…
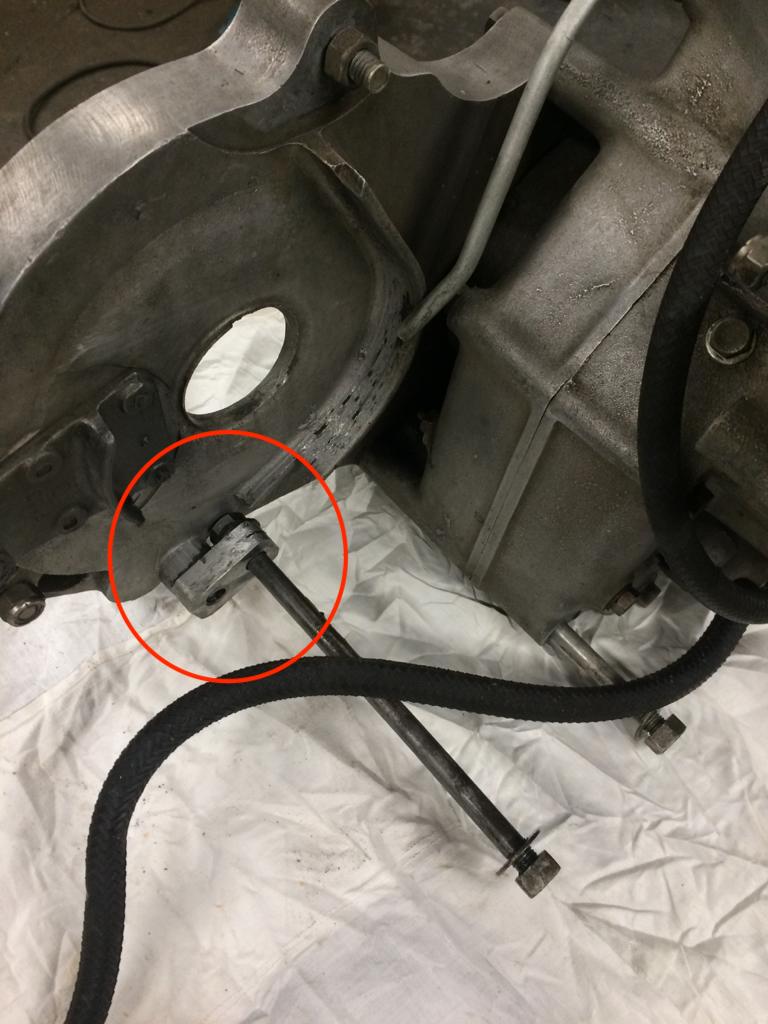
Solution #2. Voila! The sleeve and bolt match those in an image that David kindly sent me – surely this was a better engineering solution? Notice the beads of perspiration glistening on the freshly fettled alloy plate…
That’s what I’m talking about! Full gearbox adjustment is now achievable.
The end result is a part which is almost identical to David’s but utilises a different solution.
And the hole spacing appears very similar to David’s original component, visible in this shot.
We will never know the correct answer unless we are able to examine another original Grey Flash. Might full gearbox adjustment have not been deemed necessary? Or might a top hat threaded collar have once existed on David’s bike and been lost at some point? It could have dropped off and been replaced with the nut, or maybe it was always like this…
I could be barking up the wrong tree with this but we’ll stick with it. Once again, thanks Bert!
On the road-going Comet & Meteor, this part is known by the number F117.
Image courtesy of David Dunfey.
Basically, it is a sleeve that enables the stud, that passes through the frame tie, to be extended. This allows clear access to the nut, allowing it to be easily removed/replaced, and the spindle withdrawn when the bike needs to be stripped down. This part is unique to the Grey Flash and would probably have been allocated the part number F117/1.
The one fitted to 2751.
We were glad to learn that an original example was present and would have been the part the bike left The Works with. The fact that 2751 features so many more original components is indeed fortunate.
Much re-designing to the 500cc cycle parts was required by Vincent HRD to accommodate the Albion racing gearbox. The standard road-going Comet and Meteor utilises a Burman gearbox and everything was designed to accept this proprietary unit. Fitting the Albion gearbox required special brackets, unique to the Grey Flash, and major surgery to other parts.
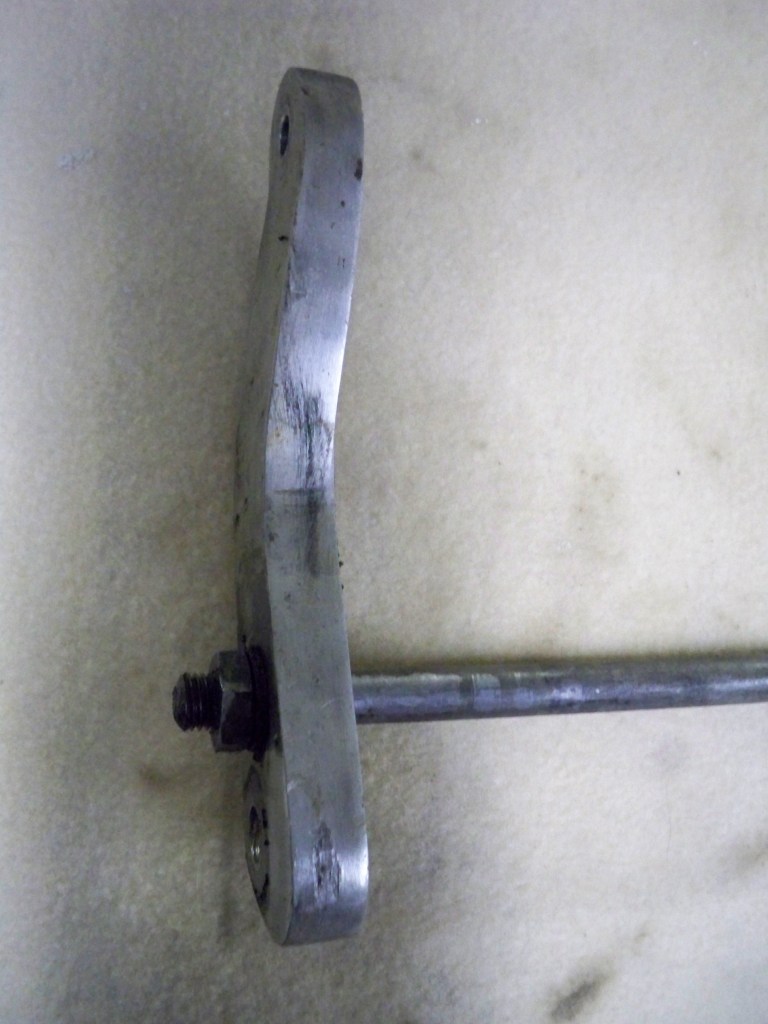
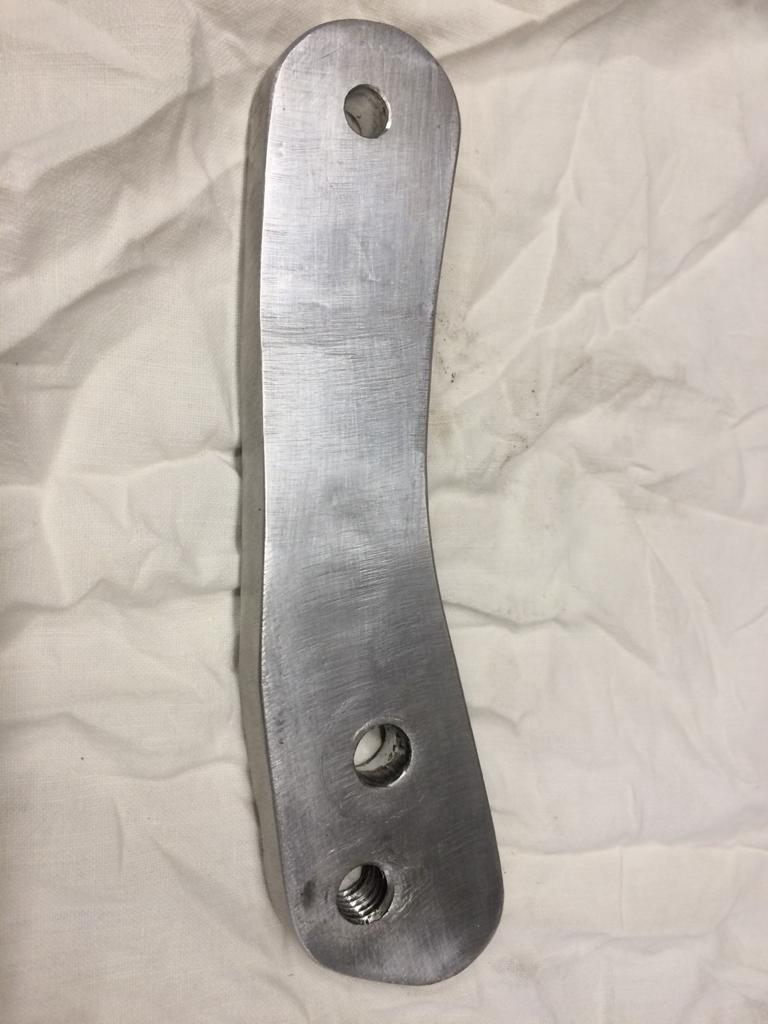
The plate in question.
When acquired, I was able to see that a spacer was inserted between the inner primary chaincase ands the Albion. Its overall appearance hinted that it might not be original to the machine.
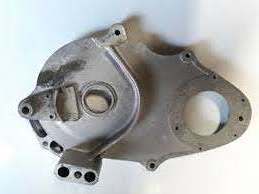
Indeed, once the bike had been broken down we could see that something didn’t look quite right… This fabricated adaptor plate had served its purpose well but was obviously not original. The inner primary chaincase certainly was original; it was stamped with the correct “42” assembly number.
I needed to get to the bottom of this and so contacted the Grey Flash “Oracle”. David Dunfey elucidated: our inner primary chaincase was indeed correct and machined as it should be; the cast-in boss, where the bottom-most stud to secure the Burman ‘box exists, has been machined off and a lot of material relieved. The reason for this is so that a much more substantial adaptor plate could be utilised.
A standard inner primary chaincase.
David obliged with pics and a clear description of what was needed. A new plate would need to be fabricated…
This is what was required. Image courtesy of David Dunfey.
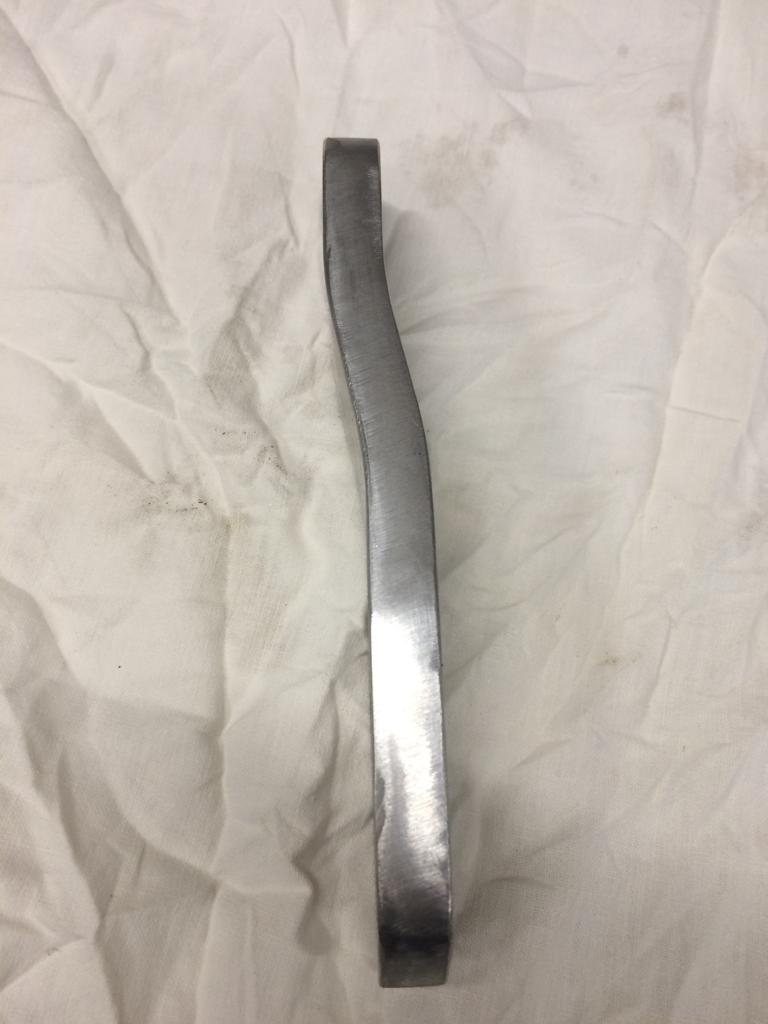
This would be no small task as the plate features a crank.
Image courtesy of David Dunfey.
Bert set to work. Once finished, he stated that this would not be a job he’d like to repeat…
Much effing ‘n’ blinding was needed to get this dogleg just right!!
Our plate doesn’t feature a captive nut – I’ll be able to elucidate as to why once I’ve spoken with Bert.
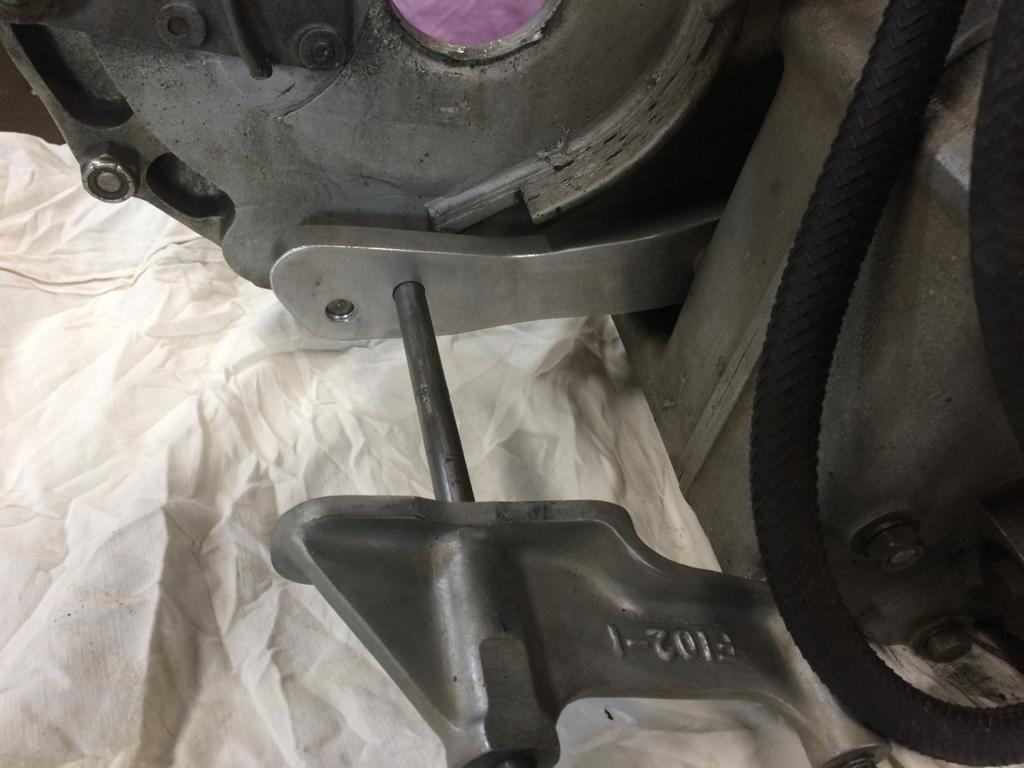
In situ.
The fabrication of this part has been a difficult job. It couldn’t have been done without Bert’s skills and David’s generous advise and expertise. The excellent result means that the machine is now a little more original than it was when I acquired it and has been returned to factory configuration. Top job!
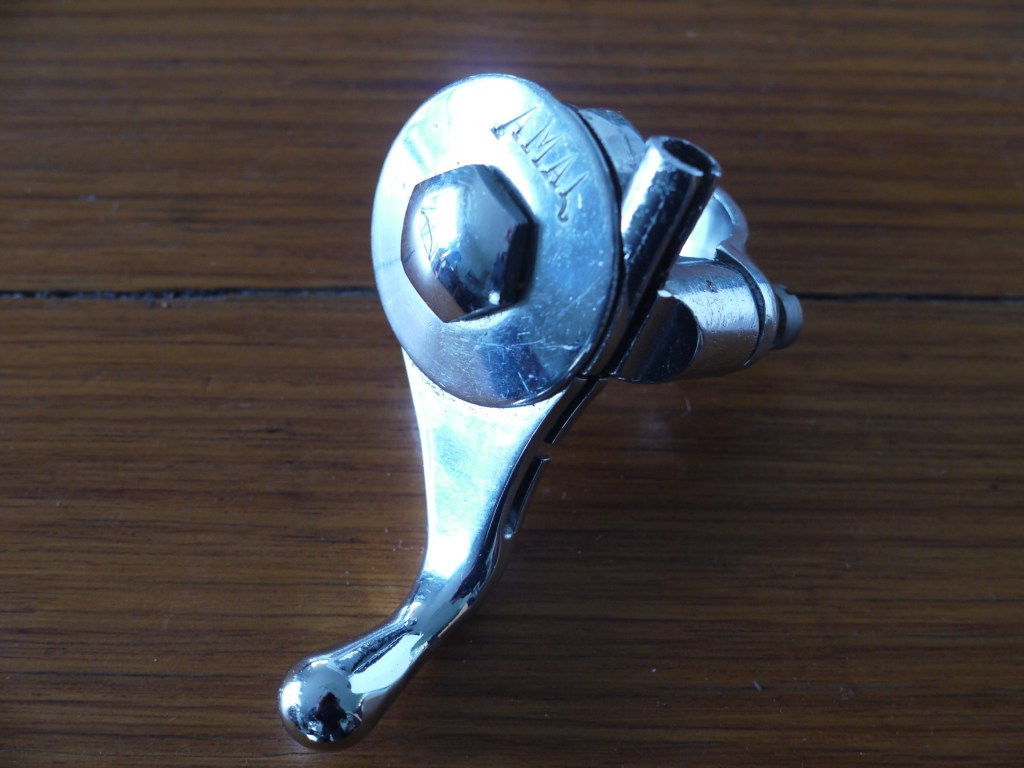
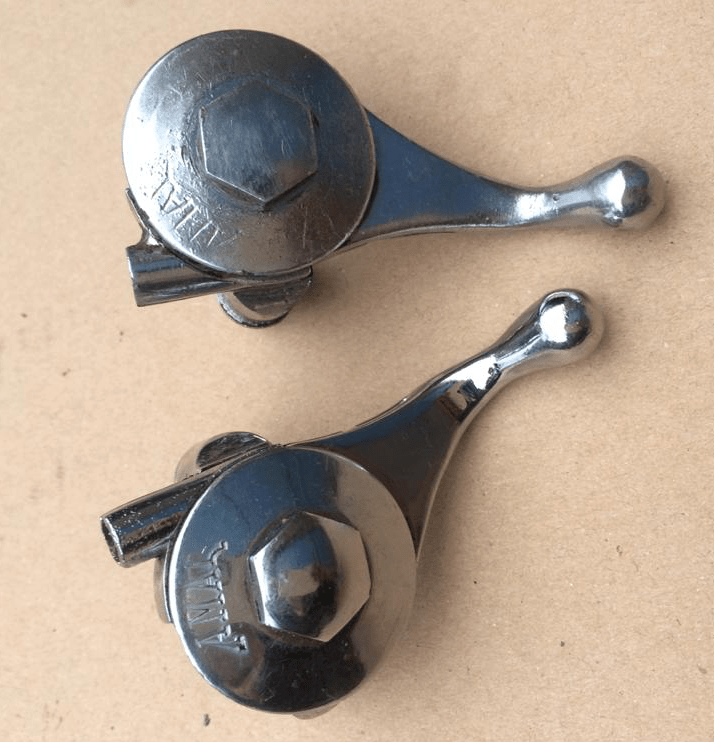
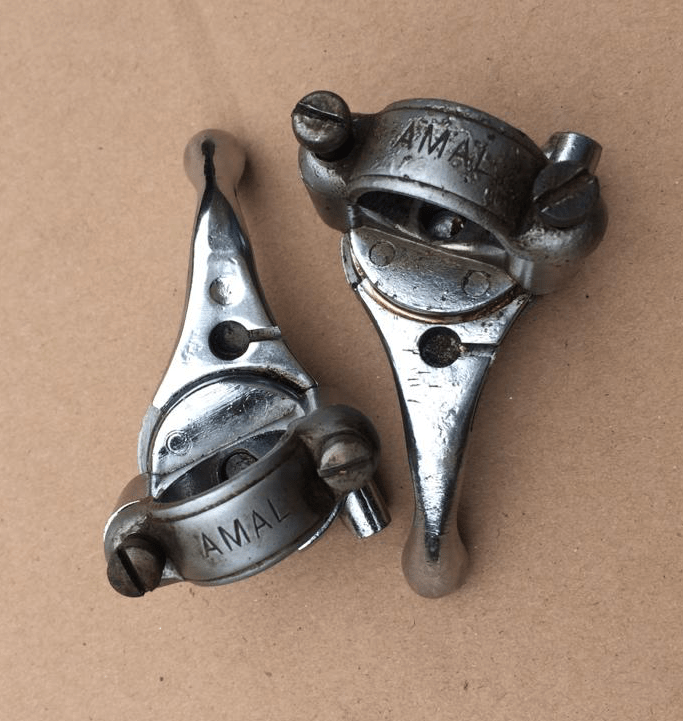
On the Grey Flash, a handed pair of AMAL levers are fitted to either side of the handlebars for manual control of the choke and magneto advance/retard. When acquired, none were present, or needed – the choke had been stripped from the carb and the incorrect magneto fitted didn’t feature manual adjustment.
Franc Trento sorted me out with a pair. They were not perfectly matched but it was a great starting point.
Thanks Franc!
Then Peter Johnson mentioned that he had found a similar lever in boxes of stuff he was sorting through.
Peter sent me an image.
This seemed like a good opportunity to make a up a more authentic-looking pair, so we came to a deal. Once the lever had arrived with Bert, he selected the best parts to make up a set.
There are some minor discrepancies visible but we feel the levers are close enough to what would have originally been fitted.
A hunt has also been on to try and track down some vintage control cables. To us, nothing would be worse than having this important machine adorned with modern plastic-covered cables…
Bingo!
These’ll look ace!
Bert managed to find some NOS items being sold on eBay. These will be used to construct a pair of correct length control cables. The devil is in the detail – very exited about this find!
As so often has been the case, brother Franc Trento has been the inspiration behind so much of this restoration. When I visited him back in 2005, I was blown away by the levels of detail he’d achieved with his assembly of the Jack Ehret Black Lightning.
Not a pattern part in sight…
It made me realise just how important getting all the tiny, seemingly insignificant details was – it’s something I’ve never forgotten. Thanks Franc sensei!